JSON Web Tokens are an open, industry standard RFC 7519 method for representing claims securely between two parties. (source)
Log in, get a token, and share the claims!
Rather than trying to write up the details, I’m just pasting the README.md from a small experiment I ran.
I was trying to understand how JWT works by interacting with it as an HTTP client.
Future work could involve trying to be a full-on identity provider (or IDP in the SAML world), and this walkthrough using Python and python3-saml seems like a great starting point.
Or I suppose I could trying using a 3rd party IdP like Okta and trying to use it from inside a FastAPI; they’ve got a sample for that.
Without further ado, here’s the README content.
Dev environment #
Depends on:
- Python 3.x
- SQLite3 for dev
Note that we’re install DEV dependencies:
| |
Configuration #
Make a copy of the .env.example and call it .env.
| |
Update the value of APP_SECRET with a secret.
You can generate a string for dev purposes using this:
| |
In production that secret will come from a secret manager and be injected into the production servers via an environment setting.
Developing #
Use the serve.sh script to start a hot-reloading server:
| |
The
serve.shis currently a very simple one-liner:uvicorn main:app --reload.
That will automatically create a SQLite3 database named whatever you decided in the .env configuration.
You can use your favorite tool or just sqlite3 test.db to examine this database during app development.
Create a user and get an access token #
Create a user #
The API is authenticated so you’ll need a user.
Use curl or HTTPie.
HTTPie is included in the dev-requirements.txt so the following should just work.
| |
You can validate this worked:
| |
Login to get an access token #
| |
Or just save to a variable:
| |
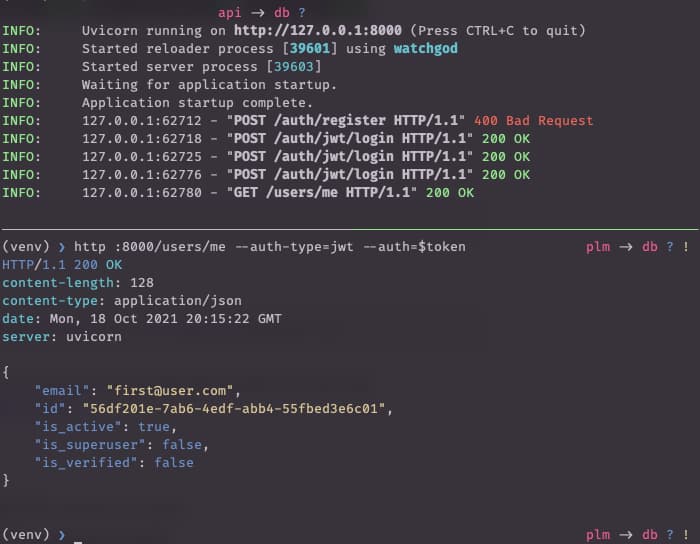
Make an authorized call. Note that support for JWT auth in HTTPie is provided by the httpie-jwt-auth library.
So make sure that’s been pip install-ed first.
| |
More user management #
The FastAPI Users documentation covers other API requests you’ll need.
As they note, the first superuser must be created directly via code or the database. For example:
| |